

Tender
SP&S #273
Astoria RR
Work Photos
Early Photos
History
Events
Join
ARPA
Links
Contact Us
Home
|
|
|
Mudring Rivet Removal
Tuesday, April 30, 2002 by MCHaving removed the firebox flue sheet, we now have to remove the mudring. This means driving out a couple of hundred 7/8” diameter rivets about 6 inches long.
In the old days, they big boiler shops had what’s called a “bull riveter”. This looked like a monstrous c-clamp that had holes for the various rivet head-forming tools (called snaps) at the ends of the two jaws. One jaw was stationary, while the other would squeeze against it either hydraulically or pneumatically. The horizontal distance between the two jaws when open was only a couple of feet, but the vertical opening was sometimes as much as 40 feet. With an overhead crane, they would suspend the entire boiler between the two jaws. With various hoists, they could position the rivet holes in line with the snaps, insert a hot rivet and use the squeezing action to do the riveting.
The advantage to the bull riveter is twofold. One being that it not only formed the head of the rivet, but also squeezed the plates together at the same time. The other being that more pressure can be applied to the rivet than what’s possible by bucking with pneumatic guns. When a rivet is driven by hand, it must be heated yellow hot to get a nice head and completely fill the hole. Remember, we ream the holes 1/16 of an inch larger than the rivet diameter so we can get it in the hole. The downfall of heating the rivet this much is that it shrinks a bit when it cools in the hole. With tremendous pressure of the bull riveter, it wasn’t necessary to heat the rivet as much, usually just to cherry red. This meant less shrinkage in the hole. This also means they are a real challenge to get out.
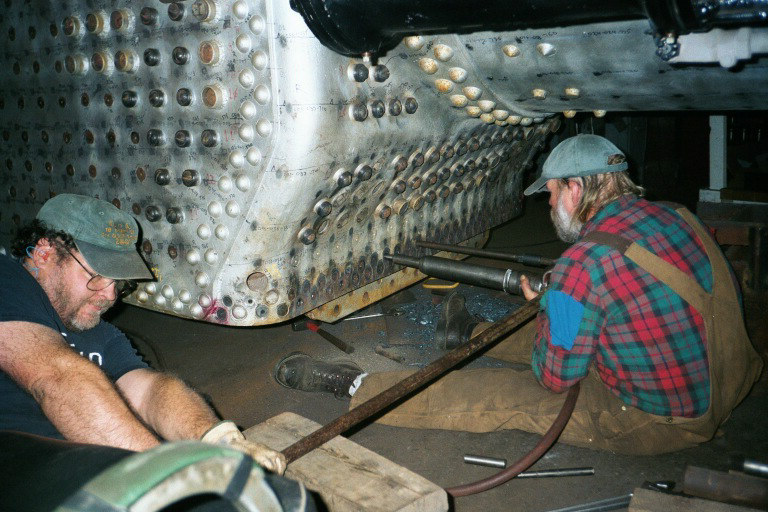
In the photo, we have already cut the heads off with an oxy-acetylene torch. Then we made bar that is threaded 7/8 for about 6 inches on one end and on the other end we welded a plate with a square hole that is big enough to receive the end of a Johnson bar. We also made a snap for our #90 rivet gun that is a straight punch just under 15/16 of an inch in diameter. By inserting the bar in an empty rivet hole and screwing a nut on the other side, then inserting the Johnson bar under the handle of the gun and into the plate on the bar, we can get about a 4:1 mechanical advantage on the gun. This holds the gun in line with the rivet and keeps it from bouncing. These big guns can be quite difficult to hold in place by hand and we really have to pound the rivets all the way out. I know those men who use to do this 10 hours a day, six days a week must have had some arms on them.
Here John keeps the gun aligned, pushes and runs the trigger. Martin pulls and Will is inside to adjusting the anchor tool. (photo by CC)
More Photo NEWS